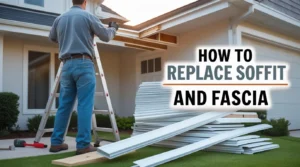
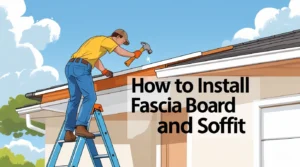
How to Install Soffit and Fascia on a Gable Roof
Learning how to install soffit and fascia on a gable roof is an important step in protecting your home from water damage, pests, and poor airflow. The gable ends of your house are the triangular parts of the wall between the sloping edges of the roof. These areas often need extra attention when it comes to ventilation and weatherproofing. This guide will help you understand the process, step by step, in a way that’s simple and clear. Whether you’re a DIY beginner or want to learn what the pros do, you’ll find it useful.
What Is a Gable Roof and Why Proper Ventilation Matters
A gable roof is one of the most common roof types. It has two sloped sides that come together at the top, creating a peak or ridge. The walls beneath the slopes are called gable ends. These gable ends need proper covering and ventilation. Without proper airflow, moisture can build up in your attic, leading to mold and wood rot. Soffit and fascia help control this. The soffit, located under the overhang of the roof, allows fresh air into the attic. The fascia is the board along the roof edge that holds the gutters and gives the roof a finished look.
Understanding the Role of Soffit and Fascia on Gable Ends
Soffit and fascia serve both functional and aesthetic purposes. On gable ends, soffits help with ventilation, while fascia boards protect the roof’s edge from wind and water. Installing gable end soffit panels properly makes sure air can move freely into the attic, which helps with temperature control. The fascia gable end also protects exposed rafters and gives the home a neat, finished appearance. When installed correctly, both fascia and soffit work together to prevent future damage and improve your home’s appearance.
Tools and Materials You’ll Need Before Installation Begins
Before starting the job, gather all the necessary tools and materials. Here’s what you’ll need:
- Soffit panels (vinyl, aluminum, or wood)
- Fascia boards
- J-channel strips
- Nails or screws
- Caulk and a caulking gun
- Measuring tape
- Drill or screwdriver
- Ladder or scaffolding
- Safety gear (gloves, goggles, and a mask)
Using quality materials like aluminum fascia can help reduce future maintenance. Make sure to wear your safety gear and always work with a partner if you can.

How to Frame Soffit and Fascia on Gable Roofs
Framing is a key step. You need a solid base to attach the soffit and fascia. Begin by checking the gable end framing to ensure it’s strong and level. If necessary, add support with 2×4 lumber. Use a level to check that the surface is flat. Then attach horizontal nailers or furring strips under the eaves and along the gable ends. This gives you a surface to fasten the soffit panels and fascia boards. Good framing supports the entire soffit and fascia installation and helps with clean alignment.
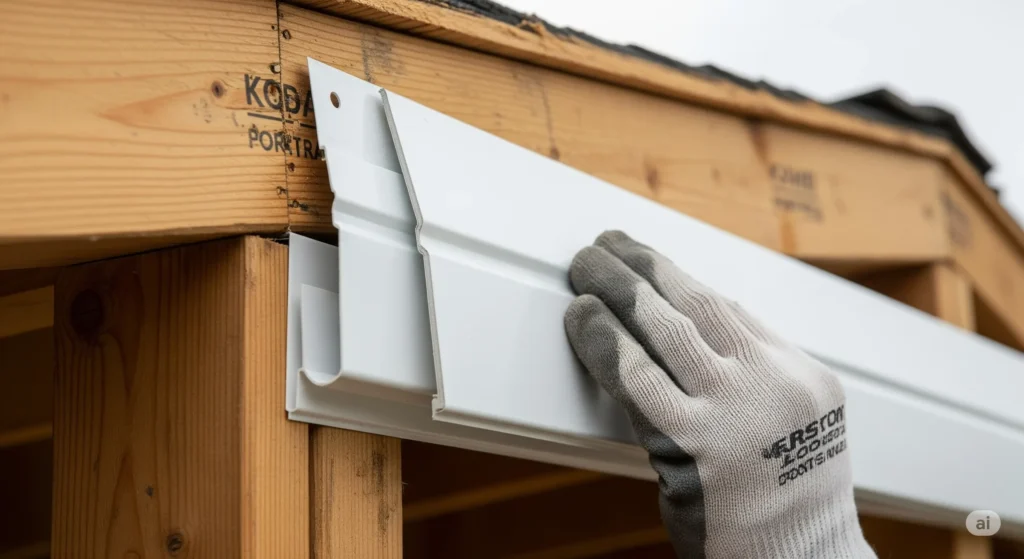
Installing J-Channel and Soffit Panels Along Gable Ends
Start by attaching the J-channel. This channel will hold the soffit panels in place. Nail or screw the J-channel along the gable end where the soffit will sit. Make sure it’s level.
Next, measure the distance from the wall to the edge of the fascia board. Cut your soffit panels to size. Slide each panel into the J-channel and fasten the outer edge with a screw or nail. Keep all panels tight and level for a neat finish.
This part of the project is also when you begin forming the soffit on the gable end layout. It’s important to work slowly and check each panel as you go.
Step-by-Step: How to Install Fascia on a Gable End
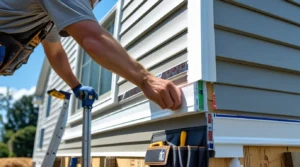
Once the soffit is in place, you can install fascia boards. Start at the bottom and work your way up the gable end. Measure and cut each fascia piece to fit snugly along the roofline.
Fasten the fascia to the framing with screws or nails, making sure it sits flush against the roof edge. If you’re using aluminum fascia, be careful not to bend it. Make sure each section overlaps slightly to keep water from getting behind it.
Installing fascia on gable end sections can be tricky at the peak. You may need to cut angles to match the slope of the roof.

Creating a Smooth Look with Proper Gable End Fascia Detail
Neat fascia gable end detail gives your roof a professional look. This means clean joints, sealed edges, and straight lines. Use corner trim or joiner strips where two pieces of fascia meet.
For added protection, apply a bead of caulk where the fascia meets the roof. Paint or finish the fascia if you’re using wood. These finishing touches protect the material and improve curb appeal.
Focusing on gable end fascia detail also helps stop water leaks and wind damage. A good-looking edge does more than just look nice — it works hard to protect your home.
Getting the Soffit Angle Right: Tips for a Clean Fit
When working with a sloped roof, the soffit angle matters. If panels are cut incorrectly, they won’t fit tightly. Start by measuring the angle where the soffit meets the fascia. You can use an angle finder tool for this.
Cut each soffit panel to match the slope. This step is key in gable soffit work, where the angles can change from one side to the other. A tight fit not only looks better but also keeps pests and moisture out.
Take your time and double-check cuts before installing. This prevents waste and keeps the final result smooth.
Adding Vents to Soffit Panels for Better Airflow
Attic airflow is important for keeping your home cool and dry. Adding vents helps. Many soffit panels come with built-in vent holes, but you can also install separate soffit vents.
To attach soffit vents, cut a hole in the panel and insert the vent. Use screws or rivets to fasten it. Space the vents evenly for balanced airflow. Ventilation is especially important in a gable roof where warm air can collect near the top.
This step is simple, but very important. Proper airflow keeps your attic dry and your home more energy efficient.
Flashing and Waterproofing Gable End Roof Sections in Wylie, TX
The weather can be rough on roofs, especially in places like Wylie, TX. Flashing is a thin metal strip that helps seal the edge where the fascia meets the roof. It stops water from getting in. Install gable end roof flashing under the shingles and over the top edge of the fascia. Nail it in place and seal any gaps with caulk. Check for cracks or weak spots where water might sneak in.
This added layer of protection is key to keeping your roof in good shape, especially during storms or heavy rain, to enhance Home Remodeling Wylie, TX.
Why Many Homeowners Trust Three Brothers Windows and Siding LLC
Doing it yourself can be rewarding, but sometimes it’s best to call in the experts. Three Brothers Windows and Siding LLC has years of experience helping homeowners install soffit and fascia on gable roofs with precision and care.
They use top-quality materials, follow local codes, and pay attention to every detail. Whether you need full soffit & fascia installation or just want a clean fascia gable end finish, their team has you covered.
When you work with pros like Three Brothers Windows and Siding LLC, you know your home is in good hands. They make sure the job gets done right the first time.
Conclusion
Installing soffit and fascia on a gable roof doesn’t have to be overwhelming. With the right tools, a careful approach, and an understanding of each step, you can improve your home’s protection and appearance. From framing and angles to vents and flashing, every part of the process matters. Done right, your new soffit and fascia will keep your attic dry, your structure safe, and your roof looking sharp.
If you’re ready to make your gable roof stronger and better-looking, reach out to professionals who care about quality. A trusted team can save you time and help you get lasting results.